
burp cloth tutorial
if you are an avid sewer, or just getting started in your creative, textile adventures, this quick & simple gift is sure to delight the mom-to-be!
this first ever tutorial from the haberdasherie will guide you through the steps to making a very special gift for baby… it is an evolution of/from other online tutorials I have used to make burp clothes in the past, incorporating different methods to create a one-of-a-kind look.


to collect:
- package of pre-fold cloth diapers
- 9x16” piece of fabric, for each burp cloth
- pins
- rotary cutter & mat
- sewing machine & coordinating thread
- iron
directions:
- iron fabrics, with steam function on
- note the direction of the pattern on your fabrics, and decide which way you would like the end-product to look.
- with fabric facing right side up, place shorter side of cloth diaper along the 16” edge
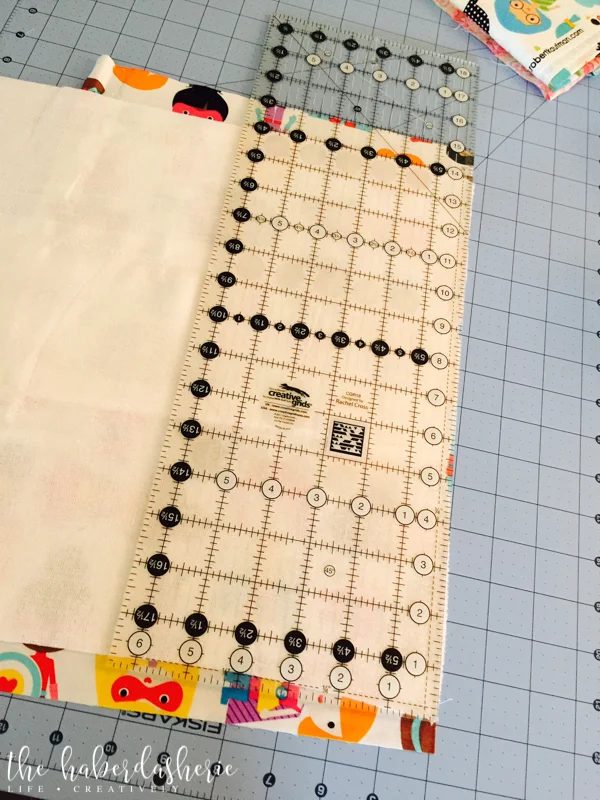

- pin & sew with a ¼” seam allowance.


- press three remaining fabric edges inward, ½ to ¾”
- iron/press towards the patterned fabric to create a flat edge
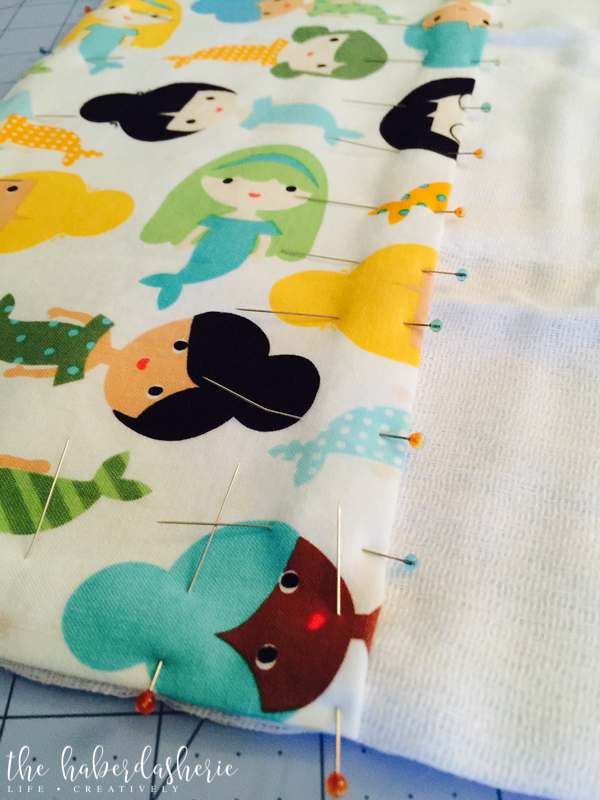
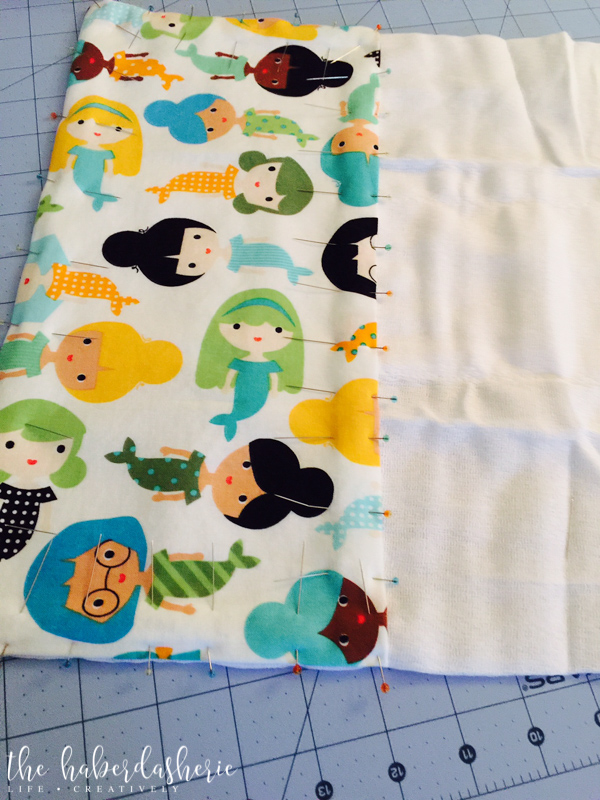
- fold your patterned fabric over the edge of the cloth diaper edge, so right side of fabric is facing upward --- this creates a crisp, finished edge.
- press along edge that you have just wrapped over the end of the burp cloth, creating a nice crease.
- pin like crazy --- every 1.5” all around --- cloth diapers stretch!

- begin sewing a 1/8” seam allowance along the right side of fabric. I like to begin at the top right corner, making the folded edge my final edge to stitch.

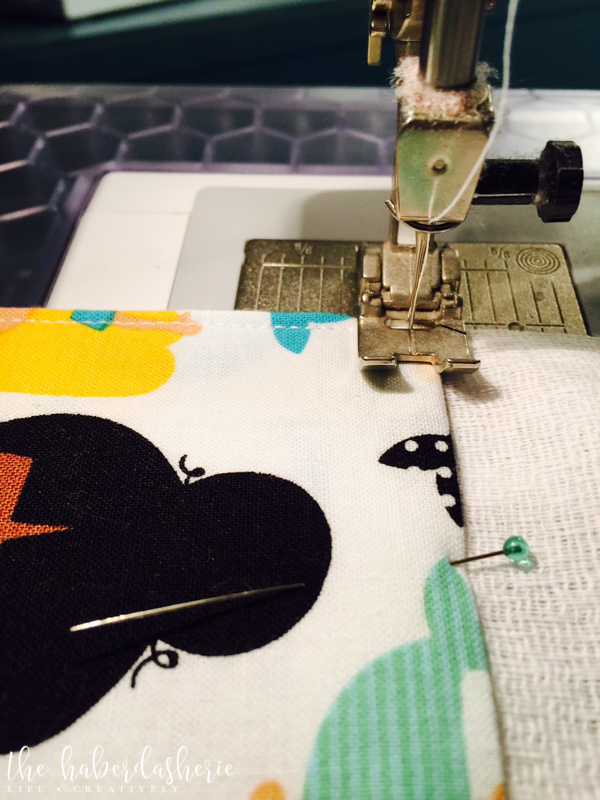
- sew along edge until nearing the horizontal edge of the patterned fabric. Remain needle-down, lift foot & rotate 90 degrees. Lower sewing machine foot and continue sewing remaining three sides.

- trim loose threads, fold & tie a bow around your beautiful, one-of-a-kind baby gift!
these are off to a lovely friend, who just delivered a baby girl!
fabrics used: girlfriends by ann kelle for Robert Kaufman & valori wells designs for Robert Kaufman